Friday, December 11, 2009

Call For Entries


For any artist in the region, well, actually anybody at all , here is a copy of the call to artists for the 9th annual Monadnock Arts Auction. This juried event has two parts. One is a silent auction
which goes on for about a week. Final bids are posted on noon Saturday, and then later that evening, the Live Auction begins - a gala, black tie affair with champagne and hors d'oeurves .
It is a great excuse to get dressed up in the middle of winter (for us New Hampshirites that means to throw the down jacket on over the ball length gown, and carry our strappy heels in while wearing the knee high snow boots). Really, it's a fun, upbeat event, and some fabulous art makes its way into the auction every year.
Artists are allowed to submit two entries. There is no cost to enter. The jury decides for which of the two auctions your piece will be selected - the silent or the live. I have always sold all my entries at this event. Even last year, when things were pretty bad all around. What you need to know when placing your prices is that bidding begins at 50% of the estimated value. There is always a chance in an auction that your painting can sell for minimum bid, so just be aware of that possibility. That did happen to me for the first time last year. These lower starting bids however, do encourage spirited bidding wars sometimes, so it is not unusual for paintings to sell above the estimated value. That has also happened to me.

Below is the actual entry information, and anybody is welcome to submit an entry. You do not have to live in the Monadnock region. We have buyers from out of state who come to this every year. Even some people from WAY out of state... and they are coming to buy art.
I think if you click on this image it will enlarge so you can read it better. And, I can email a pdf of the entry form to anyone who is interested.


Did I mention that yes, that is my painting on the card? I was honored to be selected as the poster artist for this year's event. Would love to see some of you out there send in an entry!

Thursday, December 10, 2009

You Just Never Know

NEW HAMPSHIRE, OUR HOME
Gibbs Smith, Publisher (2009)
Gr. 4-5
ISBN: 978-1-4236-0019-0


This is the front cover of a new 4th Grade Social Studies textbook. That is my painting on the upper left.
I got a call one day totally out of the blue asking permission to use this painting as part of the cover image. That was a first! I'm not even sure now where the publisher found the image, but they liked it and contacted me to negotiate a contract for its use. I think they probably saw it on my blog or website doing some image search for Mt. Monadnock or something. (that is Mt. Monadnock from Rt. 12 in Fitzwilliam, NH) So the moral to this story is, You just never know!

Wednesday, December 9, 2009

Just What Color is That Anyway?


I have gotten a couple of questions about priming with the flake white. Since there are several varieties of white paint which contain the lead carbonite pigment, I thought it might be helpful to just give this quick primer about paint pigments.
And hey, I am no expert, but I do know where to look for help.

First of all, companies that make our oil paints can call a color anything they want. So "medium red" from company A might not look anything like "medium red" from company B. You will have to learn by trial and error which brands of paint for which colors you prefer. For example, I like Windsor Newton's Cadmium Yellow Light better than Rembrandt's Cadmium Yellow Light, but I do like Rembrandt's Transparent Oxide Red.


There is however, a way to compare what colors MIGHT look like before you buy them and take them home.

For each of the chemical compounds that comprise the many different color paints we use, there is a chemical ID. This ID is consistent in the industry, so you can look at a tube of paint and know what's in it. It's the "recipe" for that particular tube color.

For example, let's say you usually use Windsor Newton's "Windsor Green". It's a nice dark cool green and you like it. But the store is out of Windsor Green and you have to get something TODAY! How do you find something that is similar? Look at the old tube of Windsor Green, and you will see that the pigment ID on it is PG7. It is a Phthalocyanine green made actually from polychlorinated copper phthalocyanine. (doesn't this make me sound smart?)
So, just go looking through the other brands of green until you find one with that same chemical name. For example, Blockx Green, made by Blockx, is also PG7. You could safely assume that it will behave similarly to the Windsor Green. Be sure and check for other ingredients as well, as some will be mixes of other compounds, as well as fillers.. try to find an ingredient list that matches the color you've been using.

There are several other factors that are identified on your paint tube.

The "permanence rating" which goes from I to IV, (I think - I"m writing this from memory)
will tell you how light fast a particular pigment is. Alizarin Crimson is notably bad in this regard, turning almost black eventually (thought maybe not in our lifetime ) and if you look at a tube marked Permanent Alizarin, you will see it is a different chemical compound, usually some form of a quinacridone red.


Also, if the name of the color includes the word "hue" then it is usually student grade, and it is NOT the actual chemical that comprises that color. For example, Cadmium Yellow HUE is NOT cadmium yellow. It LOOKS like cad yellow when you put it on your palette, but it will NOT behave like cad yellow when you use it. HUEs are cheaper, and if you're serious about your art, I'd avoid them if at all possible. It's like buying the cheap potato chips at the store. Just not the same at all.


If you are really interested in all this stuff, and it IS fascinating to get an overview of what our paints are comprised of, then you can look at this chart. Not all brands or names are listed but it has a vast array of them.
There's way more information, and it is helpful to some extent to know how some pigments are likely to behave, or which are more or less transparent,, etc.

Or, you can just GO PAINT......

Tuesday, December 1, 2009

Random Painting tips


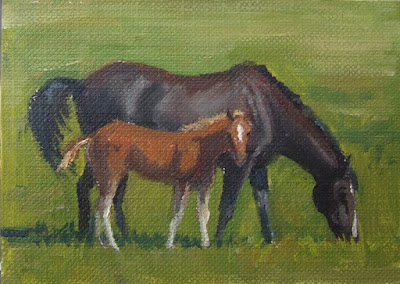
I just love painting horses. These two are tiny little art cards - 2.5 x3.5 inches.

I was thinking while painting today (note: this does not always occur) and decided I'd post a few random ideas about painting. So, in no particular order.....

1. Never let your background know what your foreground is doing. In other words, the background should always remain in the, uh, background... it's just back there, air, or distance.... dont make it a "thing" by painting around the edges of say, a bowl with your background color, leaving little ridges or, spaces of color. Better to paint INTO the edges of your object with background color and then go back and clean up the edges with the foreground color.

2. Have your big idea before you start to paint. No matter what the subject matter, you need to have decided before you begin what you want this painting to be ABOUT. Is it about one spot of rich color against a sea of grave color? Is it about one area of deep dark in an otherwise high key painting? If you don't know WHY you're painting , then you end up just painting objects. And how exciting is that? Once you know the big idea, then all the decisions you make as you go (emphasize this? diminish that? move that tree? leave out that telephone pole?) are to make your big idea happen, and not to just record an assortment of objects on canvas.

3. Value does the work, but color gets the credit. Value is the structure of the painting - the framework upon which you hang the lovely adornment of color. The lights and darks, and the interplay of them, is what holds the painting together. An exceptional painting has good value structure, even though it might be the color that attracts our attention. If you have to get one thing right, it should be the values. If you are unsure of your values, try taking a digital photo, and in whatever photo editing software you have, change it to black and white. If it reads right , the values are good.

4. Camera lens make good viewfinders. If you want to compose a painting out of what's in front of you, whether landscape or still life, and it seems too confusing out there... look through your camera - it crops out all the surrounding confusion, and lets you focus in to find a good composition. The exception to this is.....

5. Not all paintings should fit in a standard shape frame. (your camera lens is probably equivalent to a 3 x 4 ratio - like a 9x12, or 12x16.) You might need a totally custom size, like the 10.5 x 17.5 I just did, or the 18 x 29 I just had my husband cut for me.... So don't get bogged down by canvas or panel size. Paint the shape that best fits your composition. Painting on panels makes this easier, or paint on loose canvas, and cut it to the shape you want when done.

6. Edges... they're important. Maybe more important than most of us think. If you want your painting to look like a painting, something REAL, not "like a photo".. then pay attention to edges.
Distant objects?(a row of trees against the sky, the edge of a meadow in front of those trees....) soft edges. Focal point, That big ol' barn) center of attention? sharper edges. I could do several posts on just edges.


and, lastly, because I have to go figure out something to cook for supper....


7. Shadows should be thin and transparent. Does this seem obvious? Well, without going into a long paragraph about shadows, just remember this one thing... the shadow area of your painting should not have clumps or ridges of paint. NEVER impasto in a shadow. Impasto implies light and texture and surface. Shadows are just air where the sun don't shine. Keep the paint thin. "Transparent" doesn't mean use transparent paint. It means they should look transparent. This is achieved by first, using thin paint, and second, by wise choice of color. While this will vary with each painting, try this:
For warm shadows (as in a still life), try a whisper of cadmium color (red, orange, yellow) in your shadow color. Strange, I know, but it works! For cool, outdoor shadows, try using a cooler version of the local color plus it's compliment as a base shadow color. If you have sunny, green grass, the local color might be a warm yellow green. A shadow color might be a cool green (thalo or veridian) plus its compliment, red. Only use a COOL red, such as alizarin, not cadmium. This principle gives a good start for finding the right color, but use your artist's eye to select just the right shade...(no pun intended).

happy painting!


Monday, November 30, 2009

Sleep is way overrated

We've got that group show this coming weekend, and I got a late start (VERY late) in painting work for this show, so I've been staying up till all hours trying to finish some works. I believe I have painted about 20 paintings in the last 3 or 4 weeks, with all kinds of interruptions, and the holidays, etc. etc. This one is large - I did several fair sized works - not huge, but bigger than my usual. There will be a couple of 18x24's and some 16x20's. And then lots of little ones too.
I currently have 4 more that are in process.

This photo is blurred.. I think.. maybe it is just my sleep deprived eyes. I like painting silver because it pretty much disappears into the background except for highlights and reflections. That makes it fun to paint.
A friend and fellow artist once told me, about painting silver, to either paint it as a light against a dark background, or as a dark, against a light background. Here, the background is very dark, so I painted that old silver pitcher as a lighter value, and then let its shadows just fall back into the background. That's a nice way to lose an edge, and it makes the viewer "fill in the blank", which is more interesting than having every single line drawn in.


My hubby Steve has to cat-sit while I am painting. It's a tough job, but somebody has to do it. Murphy is an old cat, and he needs a warm lap. In fact, if he doesn't get his 20 hours of sleep a day, he's just worthless....


Next post, which might be after the show because it's getting down to the wire and I have lots to do still.. will be a fun little tip about painting a clear rocky stream bed... or any shallow clear water. I just finished a painting with a creek in it, and of course didn't take photos in process, so I'll do up a demo and share that... probably next week....

yawn...


Friday, November 27, 2009

Winter Painting Workshop with Stapleton Kearns

I'm putting in a plug for what promises to be a fabulous, informative painting workshop up in the White Mountains, near Franconia Notch. The workshop will be Jan. 30-Feb. 1, taught by Stapleton Kearns. Lodging will be at the Sunset Hill House, pictured above.
To read all about the workshop, go here and here on Stapleton's blog.
To look at the Inn, please go here.

Stape says that the class is already half full, so don't delay if you think you might want to attend.
I am saving my pennies!!!
There is plenty of painting right on the grounds of the Inn, as you can see from the photos, the views are pretty amazing right there. Breakfasts are included, and one big group dinner also.
And get this, did you know that snow is not white?????

Friday, November 20, 2009

Winterlude Exhibit


Coming up the first weekend in December is the Monadnock Artist's Guild's 9th annual Holiday Exhibit and Sale, entitled "Winterlude" I was invited to join this fine group of artists this year, and have been painting away like a mad woman trying to get some work ready.
The exhibit takes place on Friday and Saturday, Dec. 4 and 5, in conjunction with Peterborough, NH's First Night Celebration. We'll be in the hall of the Peterborough Historical Society, 19 Grove St. in downtown Peterborough. Hours are:
Friday, 3-9pm
Saturday, 10am-5pm.

There'll be refreshments of course, along with some fine art. Artists in this group include Mary Iselin, Phil Bean, Maureen Ahern, Frankie Brackley Tolman, and myself. Lots of variety.
If you're local, I would love to invite you to stop by for a chat....

Wednesday, November 18, 2009

Art Cards, Editions and Originals: Show, Dec. 4-31

"The Crossing" 2.5 x3.5" Artist Trading Card
Today's post highlights a sort of "trend" going on these days in the art world. In 1996, an artist in Switzerland named M. Vanci Stirnemann created some tiny little "art cards" and organized trading venues, where artists could meet each other and trade cards. The history of these small cards harkens back to the Impressionists, who often used these tiny originals as a sort of "resume", art on the front, and a description of their accomplishments on the back. You can read a more complete history of the cards here.
The one rule of the Artist Trading Cards (ATC's) is this: the cards must be 2.5 x 3.5 inches. (about the size of baseball cards) Originally, Artist Trading Cards were only traded between artists. This practice has now expanded to sell these little works of art. These cards are now known as "Art Cards, Editions and Originals",(ACEO's) and some artists are making limited edition prints as well as originals for this purpose. I know of one artist who pretty much does this full time and sells these over ebay quite effectively!
They are alot of fun.
"Taking a Break" 2.5 x 3.5" Artist Trading Card
Beginning December 5, the White Birch Fine Art Gallery in Londonderry, NH will host a show and sale of these little gems. Elaine Farmer, artist and gallery owner, will have hundreds of the cards on exhibit, all for the very modest price of $30. An Open House on Dec. 4 and 5 will begin the exhibit, which runs through the month of December. She will also have mats available for sale, ready cut for the cards. I think it's going to be an amazing thing, to see a wall covered in these miniature little works of art! I will have cards there, as will many other artists from the region, in all mediums, in all styles.
Here's what Elaine has to say about the event:
Open House reception on Friday Dec 4, 4-7p..

Kick off the holiday season in style and come celebrate with the White Birch Fine Art Gallery during its first Holiday Open House, Friday, December 4th from 10am.-7pm., and Saturday, December 5th from 10am - 4pm. Friday's festivities include a wine and cheese social from 4-7pm. and Saturday's events will include special demonstrations by local artists and artisans, all new art work in the gallery as well as guest artists on exhibit, and will feature one of the largest ACEO (Art Card) events in New England. Hundreds of these mini masterpieces will continue to be proudly displayed during the entire month of December.

Are you a card carrying art lover? Meet the ACEO! Artist trading cards (ATCs) are mini works of art made exclusively in a 2.5 x 3.5 size, the size of a baseball trading card. Made in any arts or crafts medium including collage, mosaic, fiber art and metal works, these miniature, original masterpieces could only be obtained through trading with other artists, until recently. ACEO's, or, Art Cards, Edition and Originals are original or numbered edition art cards available for sale, bringing the joy of art card collecting to all art lovers.

Come be a part of this worldwide art phenomenon and meet the artists during the Open House and take this opportunity to purchase your first ACEO.

Silver and Orange, 2.5 x 3.5 Artist Trading Card


I've shown here a few of mine. These are great fun, and would make great little gifts! And if you're a "card carrying art lover" - it's a great way to collect some of your favorite artists' works!


Sunday, November 15, 2009

Preparing Your Canvas

(this is a study done from an original painting by Richard Schmid) It has nothing to do with tonight's post except I just thought I needed a photo!


Tonight, I'd like to share one of the most valuable changes I made as a painter. This change has made a huge difference in the way I am able to apply paint to the canvas. It produces more luminous color, better brushwork, and I can honestly say, made the process of painting more fun.

It's a simple and inexpensive thing, too, so you might want to give it a try.

It has to do with preparing your canvas before you ever start the painting. And you don't have to stretch your own canvas, or even start from scratch with raw unprimed canvas. You can use this method on commercially prepared stretched canvas or canvas panels.

Unless you purchase "oil primed linen", then what you are painting on has been primed with acrylic gesso. (it's not real gesso, but that's what they call it, so we'll go with that). This surface is dry and scratchy to the touch and, here's the biggest drawback.. it is very absorbent.
Oil paint applied to this surface will soak in, and unless you apply really thick layers of paint, what you get is more like "staining" the canvas. The solution to this is to apply an oil-based primer that will seal the canvas and allow all that paint and color and wonderful brushstrokes that you work so hard to achieve to stay put right there on the surface! Who wouldn't want that?

So, let's get to it. What you'll need is a large palette knife, a tube of Flake White, and some fast dry medium, such as Windsor Newton Wingel, or Maroger, or even Liquin. The medium is optional, but since white dries so slowly, unless you are lots more patient than me, and don't mind waiting up to several weeks for this to dry, then use the medium. I'd probably recommend the Wingel. I didn't have any Wingel for this photo, but here's the main ingredients - Flake White and a large palette knife.
Note: Flake White is a LEAD-based white. Be aware of this, and perhaps wear gloves when using it.


Put about a quarter-sized dollop of the paint on your palette, and mix an equal portion of the fast dry medium. The paint will be soft and creamy.

Next, take the palette knife and plop some on the corner of your canvas. If you're using stretched canvas, you will want to make sure to lift the canvas away from the stretcher bars so you don't create a line along that stretcher bar - it will be permanent! You can see how I just sort of pushed the canvas away from the back with my finger as I worked.

Take the back edge and flat surface of the palette knife and spread that paint around on the surface. All you want to do is to seal the holes between the weave. You will not need a thick layer or alot of paint.
After you've spread all that dollop of paint, then take the FRONT edge of the palette knife and scrape and push the extra paint towards the middle of the canvas. See photo.. there's a little ridge of paint that develops as I scrape the excess off...

That's all there is to it! Just work your way around all the edges, and then, do the center, and scrape off and discard any excess paint. Again, although you CAN leave texture if you desire it,
all you really need is a very thin layer that seals the holes between the weave in the canvas.

Let this completely dry. ( a couple of days if you used the fast dry medium, or up to a couple of weeks if you didn't).

That's it! The surface should feel smooth and almost glossy. It might take a bit of adjustment to paint on this surface... whereas before you almost had to scrub paint into the canvas, brush strokes will remain on the surface.

This also makes it possible for me to do the kind of block in that I like to do for still life.. which I'll show you in another post.

Wednesday, November 11, 2009

One More!

Just thought I'd post one more mini. This one is about 3x4, and it titled "Going in for the Night". I did several winter scenes for this show, and most of them are the moody, gray winter days that we all endure so much of the time in New Hampshire. However, this one is sunny because the shadows are what really creates the design in this one.
One of the hardest things about doing these tiny little works is finding a place to sign them. That seems hard even on a regular sized painting. When space is already very limited, it requires some forethought and sensitivity to colors to sign it.

Hope you can come stop by the gallery if you are in the area - I believe the show will be hung next week on Monday. What doesn't go into this show, will go into our group art show the first week of December.... Stay tuned!


Thursday, October 29, 2009

Youtube and You

I wanted to write just a short post tonight about a great resource that some of you
might not know about. I'm sure the vast majority of you are familiar with youtube.
Youtube.com contains videos of every possible subject matter, but of interest to us is
the wide selection of painting videos. There are tutorials and demonstrations of just about
every facet of painting. There are portrait painting and figure painting demos.
Still life techniques, and lessons. Landscape and plein air tutorials. You name it, youtube has it.

I've included just a sample here. I regularly visit youtube and check out the oil painting videos.
You can reach some good ones by any simple search. Go to youtube.com, and type in any of the following:
oil painting lesson
oil painting demonstration
oil painting techniques
oil painting still life
oil painting portrait
oil painting landscape
Lilliedahl videos

That last one I've included because some of the best full-length oil painting tutorials are produced by Lilliedahl. Their videos are high quality, and the artists presenting the demos and lessons are masters of their craft. Most of the Lilliedahl youtube videos are short "teasers"... excerpts from the full length videos - to inspire you to purchase the real thing. But there's plenty of good instruction, and inspiration to be had by watching them.

You'll find some not-so-great ones also, but even those can be instructive in their own way.
Some artists that you could also search for by name are:
Jeffrey Watts
Gregg Kreutz
Robert A. Johnson
David Leffel
Richard Schmid

But just browse through and check them out! Youtube is a great thing!

Here's one sample:


Wednesday, October 28, 2009

Color and Aerial Perspective: "A Whiter Shade of Pale"


The following is the outline for our last day of color class. We talked about, and practiced painting, what happens to color as it recedes into the distance.

Flashback! Remember that song by Procal Harem? A "whiter shade of pale" is a good catch phrase for today's lesson.

Just remember the principle of “more and less.”


Close objects in a landscape have

MORE intense, pure color.

MORE contrast in values (between light and shadow sides)

MORE defined edges

MORE detail

Distant objects in a landscape have:

LESS intense, pure color.

LESS contrast in values. (between light and shadow sides)

LESS defined edges

LESS detail.

Yellow is the first color to "drop off" as distance increases. That means that any object whose color is yellow, or contains yellow (greens, browns, oranges, warm reds, etc.) will lose more and more of that yellow hue as they get further away. You'll need to lighten and gray the yellow to portray this distance. Gray it by adding its compliment, purple. You might also want to consider using a cooler version of yellow in the mix. For example, a bright yellow clump of daffodils up close could be painted with almost pure cadmium yellow light. Far away, that daffodil color might be better represented by mixing some cad lemon ( a "cooler" yellow) with white and its compliment, purple. (or a mix of ultramarine and alizarin) Sometimes I've also used yellow ochre for a situation like this, as it is a cooler, duller, grayer version of yellow.

Red is the next color to drop out of the equation. So, reds tend to get cooler, and more pinkish purple as they get further away.

Blue is the last color to drop off. That is why we often see distant mountains as blue. all the red and yellow have diminished and we're left with those bluish notes.

As objects recede into distance, color will get lighter and grayer and COOLER in temperature. All the colors fade out and lighten to eventually reach a pale gray. (remember that song title?)

White is the only exception to this rule. White gets darker and grayer..


See illustration above to see how this works in practice. A red barn and tree are shown close up, mid-distance, and far away. The color swatches show the shadow and light colors of each group. The swatches are the shadow and light sides of barn color, tree color, grass color and barn door color.

Notice how the color, the temperature, and the values changes.

Close up: Colors are rich, warm, and intense. There’s a lot of difference in value between

the light and shadow sides. The inside of the barn door is a deep warm black. Details are evident.

Mid-distance: The colors have gotten slightly cooler, and grayer in tone.. There is not as much difference in value between light and shadow sides. Not as much detail is evident, and the black of the barn door opening is now a dark purplish brown.

Far away: The colors have really gotten lighter, and grayer. There is barely any difference in value between light and shadow sides – really only color temperature notes the difference. The deep shadow of that barn door is now a purplish blue.

That's it! Pretty basic stuff, but as many of us have been painting beautiful autumn foliage, it is good to remember that those vivid reds and golds of trees near us are just not going to be that same intensity further away. We can use the principles of aerial perspective to enhance the sense of space and distance in our paintings.

Thursday, October 15, 2009

A Little Artistic License


I'm taking a break from other topics to just do a brief explanation of how I might find a painting
in a photo reference from a scene.

This is a photo taken by a friend of mine, Tom.
He sent it to me in the hopes that I might paint it, and it was such a great photo, I knew right away that it had good potential.
I loved the warm colors, and the great value contrast between the boy and the dark tree shapes behind him. I have blurred this photo a little to reduce all the tiny detail. This is just less distracting for me, and I can focus on the larger shapes.
I didn't think this needed a great deal of editing, but I did see one change I wanted to make right away. Here's a few plans, drawn in Photoshop.


In our western culture, we read from left to right. This includes paintings. We tend to enter a painting on the left and read across. So, if the center of interest comes right away, the eye stops there and has no desire to continue into the painting. The boy and boat came "too soon" into the journey in the painting, and I knew that I needed to move them.
Also, I felt that the weeds which run across the bottom of the picture could be arranged to create some directional lines to further lead the eye into the painting. Additionally, and this is a small thing, but the boy's head and the tree behind him have an unfortunate alignment, and one of them needs to move over! Look for these kind of things as you design your painting, and make intelligent choices to avoid them being a distraction in the finished work. finally I cropped the whole thing down to concentrate on the boy.

Here is the finished painting. You can see that I moved the boat over further to the right. It is definitely the focus of the painting, both by color and value contrast. To get there, I opened up the water a bit at the bottom of the painting, and the line of the water lilies now lead the eye up toward the boat, rather than blocking the way into the scene. The few brighter tree trunks catch the eye, leading it then to the dead stump, and then back to the boy. This kind of circular journey keeps the viewer engaged in the painting, and is a good thing to aim for.


That's it! Just a few design changes! Artistic license? Nature seldom, if ever, hands us a perfect composition, so these decisions we make are what really creates art out of what we see in front of us. Beware of trying to be too literal and copy what you see - design it!!


Monday, October 12, 2009

What Color is White, part 3: Temperature


We've been talking about how to approach painting white objects. Rather than just focusing on the local or native color of an object (whether it is white, or any other color), we will want to
ask ourselves some questions to help us observe what is really going on with light, shadow, value, color temperature, etc. The third question is:

3. Is the color warmer or cooler than what it is adjacent to?

To really observe what kind of color note to put in your painting, look at how the object in question relates to its environment. Just as the value needs to be evaluated, so does the color temperature. Is it warmer? Cooler? White objects, whether they be part of a still life, or in a landscape, even though they are "white" can still be either a warm white or a cool white. White objects in particular can have really subtle differences and it can take careful observation to see these nuances. The teapot in the painting above is really a creamy white, with some imperfections in the glaze, being quite old. The bowl was more of a bluish white. It was very subtle in real life, and you may not be able to tell from this photograph.

And another question is:
4. Is it getting reflected light? Any remotely smooth surface is almost certain to have some reflected light if there is bright illumination. This happens outdoors just as much as indoors. The shadow side of a white house can have rich, beautiful color reflected back up onto it, from grass, or flowers, or anything else that might be nearby.
The teapot above has reflected light from both the bowl, which shows up as a slightly bluish reflection, and the tabletop itself and grapes, which add a reddish glow to the underside of the spout. Below is the painting and I have edited out those reflected lights. The shadow still reads as a shadow, but the teapot no longer relates to the rest of the painting - without the reflected lights, not only is a chance for beautiful subtle color variation missed, but the unity of the panting suffers as well.


Sunday, October 11, 2009

What color is white, part 2 (with cows)


I promised cows, so here she is. What a lovely lady. She is really a great example to illustrate the point of our second question. That question is:

2. Is the value darker or lighter than what it is adjacent to?

It's all relative. It matters little what the local or native color of an object is. Much more important is how is the light or shadow affecting that color?

And here's where our bovine friend comes in.
Look at the black portion of her coat where it is in the sunlight. Now look at the white portion of her coat in shadow. Let's say, under her belly behind her front leg. Can you see that the white in shadow is actually darker than the black in sunlight? Who'd a thunk it?
If we get caught up in what the native color of something is, we'd never think to paint the shadow white that dark, or the sunlit black that high in value! That's why we need to carefully observe and check our values against one another.

A white church silhouetted against a morning sky could easily be quite a bit darker than the sky.
If you find yourself having to paint outlines around a white building to get it to "show up" against the sky, then it is probably a matter of incorrect values.
Here's the Cutler Bldg. steeple here in town as an example.


We've already seen in yesterday's post that the shadow portion of a white teapot can be very dark.


Here's another picture of cows just because I like 'em.
Tomorrow, maybe we'll have baby ducks or kittens or something.


What Color is White?

Actually, the question could be, "what color is anything?" but I've chosen white because we often, as painters, get hung up with the color of something we're trying to paint, and white seems to cause the most problems of all.
Here's our first example:


that sample cropped from the painting is part of the white teapot. "But it's not white!" you say.


THAT'S THE WHOLE POINT!!!

What happens to us as we stand before a landscape, or a beautiful still life arrangement, is that we look at the objects and think of what they are in a literal sense. "That's a white house", we say to ourselves. Or maybe, " I'll be painting that beautiful white ceramic bowl with the blue design on it."

What we are really painting is how our eyes react to the light, or lack of light, on an object.

A better way to approach painting anything, no matter what the object, is to first ask a couple of questions.
1. Is it in the light or in the shadow? (news flash: it has to be in one or the other!!)
2. Is the value darker or lighter than what it is adjacent to?
3. Is the color warmer or cooler than what it is adjacent to?
4. Is it getting reflected light?
5. Is it part of the focal point of this painting?

I'll be looking at those questions a little bit in the next few posts. For tonight, here's the first one.

1. Is it in the light or in the shadow?

What we're really painting is how our eyes react to light. So, forget for the moment what you think the literal color of something is. Forget that it is a "white house" and just look at how the light is falling, or not falling on it. Paint that color, whether it be a pale yellow or a deep purple, or a greenish orange. A good rule of thumb is that if something is in shadow, it's probably darker than you think it is.
Another consideration, especially troublesome with white, is that you almost NEVER use pure white. A white ceramic bowl, in the light, will still not be pure white. You must leave room for that very brightest spot of highlight where the light hits the high point of the object. THAT highlight MIGHT be pure white, but if you paint the whole lit section of a bowl white, then you have nowhere to go to put the highlight. So, consider a "light white" for your lit section, and a "dark white" for the shadow side.

Next post: Cows and values!

Saturday, October 10, 2009

Form Shadows and Background Color


Here are two small still lifes. I'm using them as an example of a principle about light and shadow and background color.

In a still life, one of the important things to consider is the background. The background doesn't just represent the "back" of whatever space you are painting.
It is , or should be, representative of the air and the atmosphere surrounding the focal points. Your objects need to exist in space.

By the way, while I'm thinking of it, consider giving your still life objects MORE space than you might initially be inclined. One of the common traits of beginning artists is to paint that pot, or the apple, or whatever as large as they can fit on the canvas. Let them breathe! Give them some room! Up front and in your face can be a valid compositional decision, but if you will take time to study some of the great paintings, you will notice that there is some comfortable distance between the viewer and the objects portrayed. Try it!

Background color can be light or dark, it can be generally warm or cool. These two paintings are examples of a darker, warm background, and a lighter, cooler background. Background color is an aesthetic decision that you will make as you arrange the still life in the first place.
However, having decided on your set up and the background color, you have also determined, in part, the form shadow color of your objects.
How does that work?
Since the background is at least in part the "air" around your objects, as the form of those things recede into space they have a little bit more of that air or atmosphere between them and you, the viewer. When you are trying to "make that pot look round" what you are actually doing is trying to show how the form turns back and goes further into space. One way to help create this illusion is to include a little bit of the background color into those form edges. Take for example, the leaf that is in the first still life, that is on the right side of the stem. It is further back in space than the more brightly lit leaf, and you can see how it has much more of the background color floated into it. You can also see this in the shadow side of the pot... there is a bit of that background in there, and the effect is that the pot is round, and the edge turns back into space.
In the other still life, the background color is lighter and cooler, but the principle still works.
Look at the lemon slice in the background. Compare the color of that lemon to the foreground slice. Can you see that the further lemon slice contains some of that cooler greenish gray background color? If you have trouble seeing it, try squinting. Squinting is a great way to reduce superfluous detail while you are painting, and renders the major values more clearly.

There is an important principle to remember, and that is this:
COOL LIGHT/ WARM SHADOW.
The overall shadow color in a still life should always be warm!
Unless you're painting objects on a sunny windowsill, then you should consider that the light represents cooler, natural north light. This means shadows will be warm. So, if you have a cooler background color, as in the second example here, it is only a touch added to the native color of your object, or mixed into your overall shadow color. Don't make the mistake of thinking that you can just take your background color and use that as shadow color. This is where the intelligence and keen observation of the artist must come into play. Look at the whole lemon - can you see how the overall shadow color is very warm, an orangey-green, and the reflected light from the table top is even warmer, but right at the top edge of the shadow form, there is a bit more of that background greenish gray color. There's no reflected light there, and no direct light, so the background color has a bit more influence.
Well, this is alot to think about, and there are no quick fixes or "systems". There is only the intelligence and observation of you, the artist, making decisions which best further the concept and design of your painting. If it were easy, anybody could do it, right?

Friday, October 9, 2009

Donations for a Good Cause

I have always felt that being able to spend time doing what I love so much is a real blessing. I'm quite thankful to paint full time, with all the
joys (and sometimes frustration!) that brings me on a day to day basis.
So, I feel it's only right to give back a portion of my work, and I make it a point to donate art
for various charities, good causes, and Christian ministries. I make no apologies for being a person of faith!
This small still life (8x10) entitled "Stoneware and Peaches" is donated to the Jaffrey Civic Center. The Civic Center is really a gem; it hosts many art exhibits during the year, juried competitions, and art classes, besides offering meeting and classroom space for numerous other community events. So I'm happy to give this work to them for part of their annual fundraising appeal. The building was built around 1960, and is not handicapped accessible. We are currently raising much needed capitol to install an elevator, so that anyone and everyone can enjoy the exhibits and other functions at the Center. This painting is being raffled off later this month. Tickets are only $5, so if you'd like to purchase a chance for this painting, please contact me directly at deb@debpero.com or call the Jaffrey Civic Center at 603-532-6527. And here's the sales pitch: Don't delay, tickets are going fast! :-)

Thursday, October 8, 2009

Working Like Mad and Using Canvas Scraps


Oh boy, this time of year gets really busy! Besides working on our mural project here in town, which turned out to be just about a full time job the last 4 or 5 months, I've got several shows to prepare for. More about those later, but mostly lately I'm painting like mad. This little painting is one I finished this week, entitled "Carnation and Old English Creamer". (you can purchase this painting here. And on a composition note, I originally just had the carnation and the creamer. Knowing that having just two items in an arrangement, I would have to work to be sure one was the focus of attention. I thought that by softening the edges of the carnation, and making the creamer very sharply defined, that would do the trick. It did not, and this painting suffered from the "one for each eye" kind of syndrome.. Where do I look? At the carnation? At the creamer? I realized that a spot of rich color would tip the scales in the favor of the creamer, and added the single grape. That did the trick, don't you think?

Since everybody is budget conscious these days, I thought I'd share a tip for using up some smaller scraps of canvas. Since I sometimes pick up odd size frames at our local frame shop, I need to custom make a painting surface for them. There are two ways to do this. First is to create a panel by cutting a piece of masonite ( I buy a whole sheet, prime it, and then cut it to size.) You can see how to make your own panels here.

The other way to create a painting surface in an odd size is to use canvas scraps. If you buy rolls of canvas, then you'll have odd pieces left over here and there. Keep those to use for projects like this. I also buy pre-primed canvas pads. These come in various sizes up to about 18x24 and usually contain 10 sheets of canvas per pad. I like to get 16x20 size.. It is about $14, and I often use these sheets for odd size works. Just measure out what size I need, draw the outline on the canvas, and paint! Then, once the painting is dried, I will cut the painting out of the larger sheet and affix it to a backing board. This board can be anything from a piece of masonite to plywood, to gatorboard - anthing that can provide a non-warping sturdy surface to glue the canvas to.

Here's what the painting looks like before I cut it out of the pad. This one is a really odd size, 4x10, but I have a nice little frame for it. While painting, I just use the pad itself (has a heavy cardboard back) as a nice support. I use a 3M spray adhesive to affix the canvas. It sticks like, well, glue, but if I need to remove the canvas for any reason later down the road, I can carefully peel it off the backing with no damage!

Tuesday, October 6, 2009

Painting Workshop!


I will be leading an oil painting workshop entitled Color Camp! on Wed. mornings, beginning Oct. 14 at the Jaffrey Civic Center. The workshop will run for 3 successive weeks, 9am - noon. Each session is $35. You can call the Civic Center at 532-6527 to register for one or all three sessions.

This will be a fun, light-hearted workshop chock full of some good, useful info. Though primarily geared towards beginners, we already have a number of seasoned painters attending, and it will be a good review of some basic principles of color and how to make intelligent color choices in your painting. With the group attending, we should have some great discussions!
Here's a basic overview of the three sessions.

Color Camp

Not rules, but tools!

As artists, we want to use all the tools at our disposal to help us create good, solid paintings. These 3 sessions are designed to review some basic principles of color that can help us make intelligent choices as we work. Consider these some added “weapons” in your arsenal or tools in your toolbox that you can pull out when you need them!

We won't be trying to complete polished paintings, but rather we'll tackle some exercises to re-enforce each day's lesson. In addition, each day we'll look at a "problem painting" that contains a common error. Heck, it might have several problems! Based on our color lessons, the class will "dissect" the poor painting and decide what's wrong and how to fix it, and then you'll get a chance to create your own "new and improved" version!

Session 1: When You’re Hot, You’re Hot!

Color Temperature: It matters!

Why can’t I use the same colors to paint an orange that is sitting on my kitchen table as an orange sitting outside on my deck railing? In other words, how does outside light differ from inside light? One word: COLOR TEMPERATURE! (okay, okay, that's two words). Tip: This might be very useful info if you want to paint still life or landscape... or interiors.. or figures inside or outside... or old cars rusting under a tree... or maybe a package of neon gummi worms....

Where is this orange? Outside or inside?


Session 2. Good Morning, Sunshine!

Portraying Time of Day in Your Landscape

What’s the difference between morning light and late afternoon light? Is there a difference? How do we make our paintings look like morning, noon, or evening?

Look at this poor painting. I can't tell what time of day it's supposed to be. And there are some other real errors. Should we shoot it and put it out of its misery? Wait, there's hope! Come find out how we can correct and improve this baby.


Session 3. Way Over Yonder…..

The effects of Atmosphere on Color.

When is a red barn not red? What happens to autumn foliage on that distant hillside?

This painting has a problem. Actually, it has several glaring problems, and these problems are common errors that can be avoided by understanding some simple principles of color and design.

Do you know how to fix this painting?


Well, come join us for some fun as we focus on color! There are about 3 spots left in the class.

Sunday, September 20, 2009

Stapleton Kearns workshop


This weekend, I am taking a plein air painting workshop with Stapleton Kearns. Besides being an incredibly gifted painter, Stape is also a great instructor, and all around funny guy. We are spending three days on Peter and Ann Sawyer's beautiful 200 year old farm here in Jaffrey.


The Sawyers welcomed us with their typical hospitality, and have given us pretty much free reign to wander around their 300+ acres of hayfields, hedgerows, and cow pastures, with views of Monadnock, the farm structures, including three silos and a fabulous old barn, and the farm house itself. Weather has been absolutely perfect, so we're loving every minute of it.
And painting like mad, for about 8 or more hours each day. This is hard work! We're exhausted, and inspired and frustrated all at the same time. As Stape put it .. whenever anybody sees him painting outside and comments "Oh, that looks so relaxing" he wants to pummel them. Painting is not easy! It takes all the mental and emotional energy you have to do it well, and lugging all the equipment around and standing up all day, can be physically draining also. But so worth it.
Most of us are here because we MUST paint - it is just in us. And this is an investment in trying to get better at what we do.


.Here is a short excerpt of Stape doing the morning demo - he is discussing mixing greens, something that every landscape painter who has had to deal with summer painting in New England is well aware is a difficulty!


Here we are trying to take it all in!


We meet and set up at 9am, and paint till the cows come home. Seriously. No kidding. The cows wander over near our easels in the morning, and then they go up the hill to the high pasture. In the evening, around suppertime, they come plodding back down to where we are. We paint until there's not enough light left to paint, and then we've been going out together as a group and eating dinner and debriefing the day's work.

I am learning lots. Today I tried something totally new and different for me.
I'll probably be posting more about this in a later blog. I couldn't work on my first day's painting because it got dog hair stuck all in the wet paint,(thanks, Tucker!) and I had to let it completely dry so that I could brush the hair off. So today, I started a new small panel with a twist. I used what is called an "earth color palette". That is, instead of using the regular array of colors , like red, yellow, blue, green, etc., I used only earth colors. So I had burnt sienna (a reddish brown about the color of the cow), yellow ochre (the color of straw), black, and white. We all know that the three primary colors, red, yellow and blue, can be used to mix all the other colors. In the earth palette, there are no primary colors. The burnt sienna becomes the "red", the ochre is the "yellow" and the black becomes the "blue". It is a delicate balance of mixing values and color temperature that is challenging and intriging, and I really loved working with it today. So much that I think I will do another larger piece tomorrow. Here is a photo of the (still unfinished) painting from today. Can you believe there is no blue used? That sky appears blue because the coolness of the gray "reads" as a blue because of the warmth of all the other colors.
And though it is impossible to mix a real green with these colors, there are greenish tones in some of the mixes. Can't wait to try another one!